
If you are getting ready to list, the single highest-ROI prep work you can do is also the cheapest: declutter. Industry surveys find that decluttered, depersonalized homes sell for 3-5% more and roughly 27% faster than comparable listings still buried under personal belongings. That is not a staging upsell; it is buyer behavior. When a prospect walks in and sees crowded counters, family photos, and overflowing closets, they stop picturing themselves in the home and start cataloging someone else’s life.
This guide walks through how to declutter home for sale preparation, room by room, with concrete actions you can knock out over a weekend. We will cover what to remove, where to put everything, and how to handle the trickiest spaces (closets, garages, kids’ rooms). We will also cover what to do if your listing photos have already been taken with clutter still in the frame, because decluttering your home for sale does not have to mean reshooting the whole gallery.
Why Decluttering Matters More Than Staging
Buyers do not measure a room with a tape measure. They measure it with their eyes, and the eye reads visual density, not square footage. A 200 sq ft bedroom with one bed, two nightstands, and bare walls reads as bigger than a 250 sq ft bedroom packed with a desk, exercise bike, laundry hamper, and three framed posters.
Decluttering does three things at once. It makes rooms photograph and feel larger, which is the single strongest driver of perceived value. It shifts the home from “lived in” to “movable,” which lets buyers project — the faster a buyer can mentally place their own couch in your living room, the faster they write an offer. And it forces you to depersonalize, which removes the social friction of feeling like a guest in someone else’s space.
Staging adds the polish; decluttering creates the canvas. You cannot stage your way out of a cluttered home — the photos will still show too much stuff, and walk-throughs will confirm it.
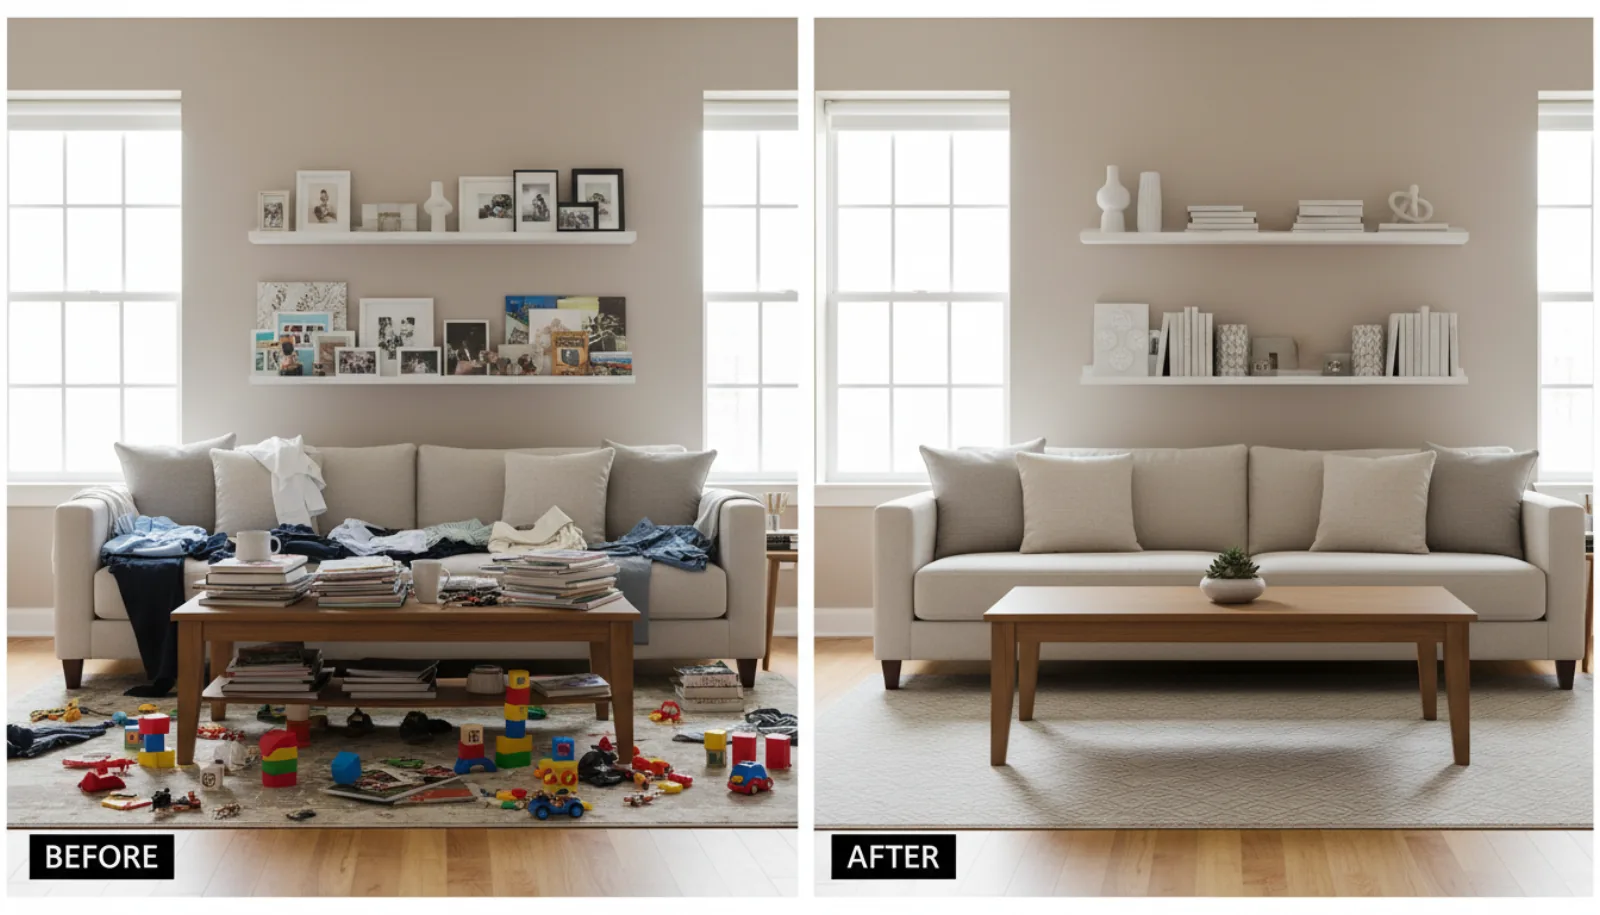
The visual gap between a lived-in living room and the same room photographed for an MLS listing is mostly decluttering, not staging. The before-and-after below is closer to reality than most sellers expect:
The 10-Step Room-by-Room Declutter Plan
Work through the following 10 steps in order. The sequence matters: front entry first because it sets the buyer’s first impression, photograph last because it locks in the result. Budget roughly one weekend for an average 2,000 sq ft home, more if you have not done a deep purge in years.
Step 1: Start with the Front Entry
The first eight seconds of a showing happen before the buyer fully steps inside. Clear shoe piles off the floor, take down the coat rack overflowing with jackets, and remove the umbrella stand if it is jammed. If you have a console table by the door, remove every key bowl, mail pile, and decorative object except one intentional item, like a single vase or a framed mirror above it.
Common mistake: leaving a doormat with a personal welcome message (“The Johnsons - Est. 2014”). Swap it for a plain neutral mat. Same goes for monogrammed wreaths, family-name signs, and “live, laugh, love”-style decor near the door.
Rule of thumb: a buyer should be able to set down a bag and coat in your entry without moving anything else first.
Step 2: Declutter the Kitchen
Kitchens make or break listings, and cluttered counters are the number one offender. Clear every single small appliance off the countertops: toaster, coffee maker, blender, knife block, paper towel holder, the works. Aim for 80% bare countertop. The only exceptions are one intentional item per major surface (a fruit bowl, a single cutting board) and the range itself.
Then open the cabinets. Buyers will. Pack up half of your everyday dishware into boxes and store them off-site. Cabinets that are 50% full read as spacious; cabinets crammed shut read as inadequate. Empty the fridge front of magnets, kids’ artwork, and grocery lists. Wipe down the top of the fridge, which is almost always a graveyard for cookbooks, cereal boxes, and dust.
Common mistake: leaving the spice rack and oil bottles next to the stove because they “look homey.” They do not. They look greasy in photos.
Step 3: Empty Bathroom Surfaces
Bathrooms should look like a hotel, not a daily-use space. Strip every product off the counter, the tub edge, and the shower caddy. Toothbrushes, razors, half-used shampoos, the rubber duck, the bath mat with the cartoon character — all gone, every single time you have a showing or photoshoot. Roll up fresh white towels and place exactly two on the rack. If your bath mat is tired, replace it with a clean white one for $15.
Trash cans get hidden in cabinets. Toilet paper rolls go in a basket inside the vanity, not stacked on the back of the toilet. Medications and personal hygiene items belong behind closed doors, period.
Rule of thumb: a stranger should be able to use your bathroom without learning anything personal about you.
Step 4: Depersonalize the Living Room
Living rooms are where buyers test the lifestyle fit, so they need to feel neutral. Take down family portraits above the sofa and replace them with simple landscape art or framed prints. Remove political signage, religious iconography, and college-pride memorabilia. The goal is not to erase your identity; it is to depersonalize the space so a buyer can project theirs.
Reduce throw pillows to a maximum of two per sofa. Pack up at least half of the books on built-in shelves and leave the remaining ones styled with a few decorative objects mixed in (vases, small sculptures, plants). Remote controls go in a drawer. Charging cables get coiled and tucked. The dog bed, the kid toy basket, the pile of magazines — all stored out of sight before any showing or photo shoot.
Common mistake: leaving one “tasteful” framed wedding photo on the mantel as a compromise. Don’t. All personal photos come down.
Step 5: Clear Out Bedrooms
Each bedroom should feel like a guest room at a nice B&B: bed made, two nightstands, two lamps, neutral bedding, almost nothing else. Remove exercise equipment from the primary bedroom (yes, including the Peloton). Pack up the laundry hamper, the dresser-top jewelry tray, the partner’s nightstand pile of books and supplements.
Kids’ rooms get the same treatment, scaled down. Stuffed animals reduced to one or two on the bed, wall art reduced to one framed piece, toy bins consolidated into a single closed cube, floor completely clear.
Common mistake: a “home office in the corner” of the primary bedroom. Move the desk out entirely if the room cannot comfortably show as just a bedroom.
Step 6: Thin the Closets (30-50% Rule)
Closets are where buyers gauge whether their stuff will fit, and full closets signal “this house is too small.” Thin every closet to 30-50% of its current contents. That means physically removing half your hanging clothes, half the shoes on the floor, and most of the boxes on the top shelf, then either donating, selling, or boxing them up for storage off-site.
Use matching wood or felt hangers (replace the wire and plastic mismatched ones — a $40 fix that transforms a closet’s appearance). Group remaining clothes by color or type. Floors should be visible. Top shelves should have one or two folded items, not towers of stuff.
Rule of thumb: the closet should look like the kind of closet the buyer wishes they had, not the kind they already have.
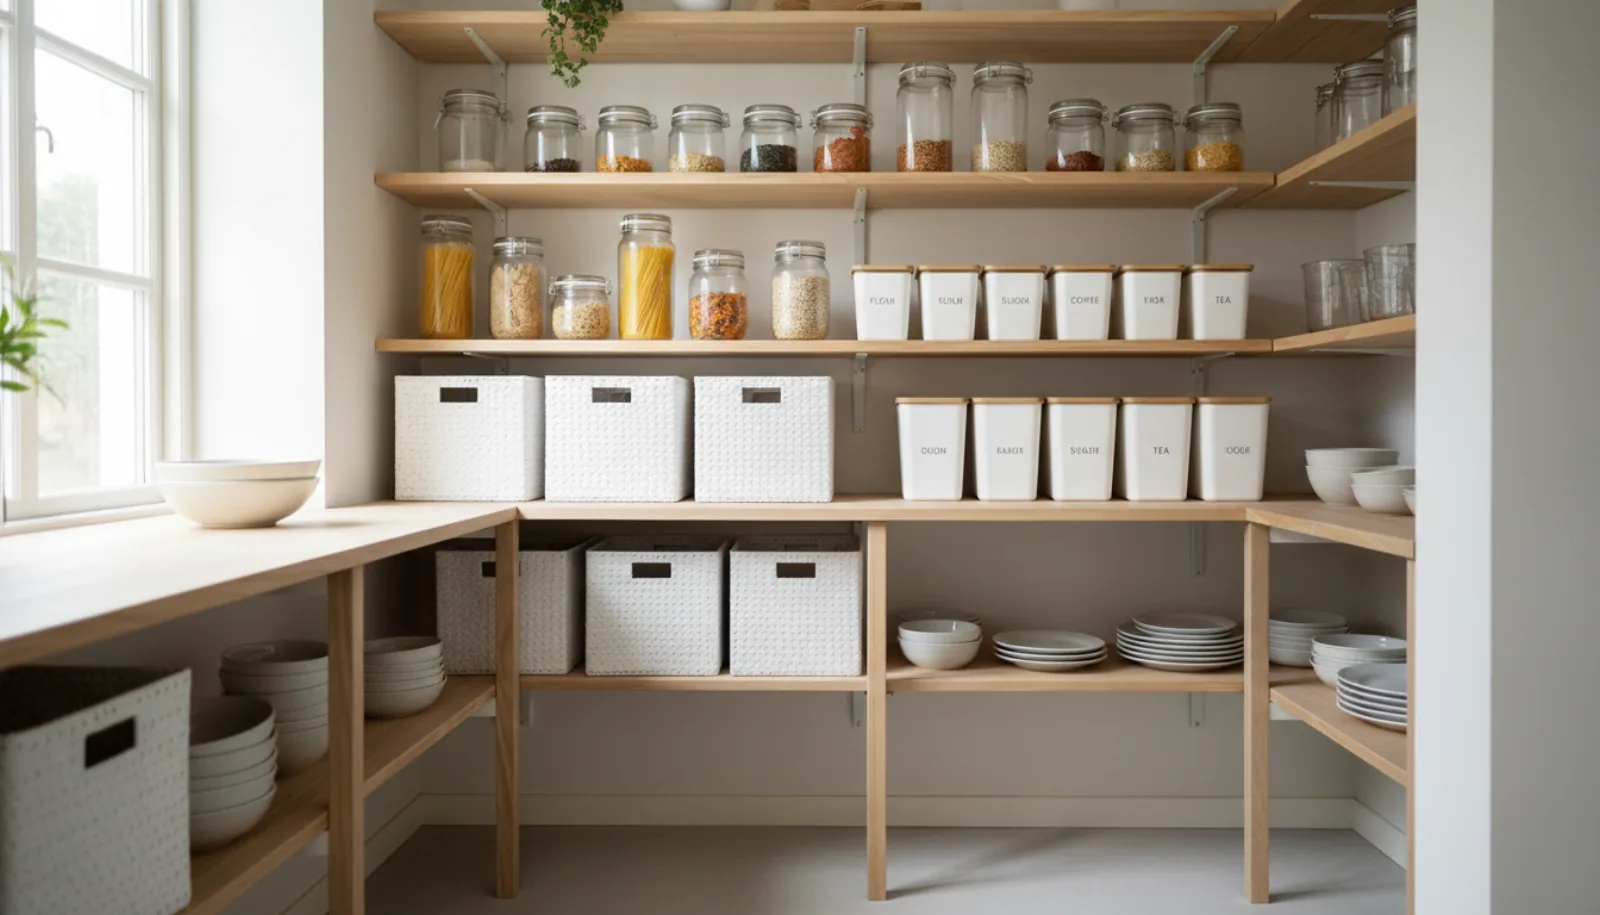
The same edited-not-empty principle applies to pantries and storage closets — buyers open them, and what they read is “is there room for my life?” An organized pantry answers yes:
For a quick-hit explainer that makes the case in under five minutes — the kind of thing to send a hesitant seller the night before the photographer arrives — this segment from a professional organizer is a useful nudge:
Step 7: Tackle the Garage
The garage is the room people give up on, which is exactly why dealing with it is a competitive edge. Buyers want to know if they can park two cars and store seasonal items, not whether you have collected 15 years of paint cans and old kid bikes.
Pull everything out onto the driveway. Sort into four piles: keep (small), donate, sell, dispose. Re-enter only the keep pile, organized on shelving or in labeled bins along the walls. The center should be empty enough to park both cars. Sweep the floor.
Common mistake: deferring the garage because “buyers don’t really look there.” They do, and an organized garage signals “this house has been well maintained.”
Step 8: Remove Personal Photos and Memorabilia
This deserves its own step because it is the one most sellers resist. Every family photo, every kids’ drawing on the fridge, every “Mom of the Year” mug on the desk, every framed degree on the office wall — all of it comes down. The reason is not aesthetic; it is psychological. Buyers viewing personal photos feel like trespassers. Trespassers do not write offers.
Pack photos and memorabilia into clearly labeled boxes (“primary bedroom photos,” “office diplomas”) so reinstalling after the sale takes an hour, not a day. Replace photos with neutral wall art or, in some rooms, just leave the wall bare — empty walls read as clean, not unfinished, when the rest of the room is well-staged.
The same logic applies to fridge magnets, sports trophies, religious art, and bumper-sticker-style decor. Depersonalize ruthlessly.
Step 9: Stage Surfaces, Don’t Strip Them
After 8 steps of removal, there is a temptation to leave surfaces completely bare. Don’t. Bare surfaces read as cold and unfinished. The goal is edited, not empty. Each major surface should have one to three intentional objects: a stack of two coffee-table books with a small bowl on top, a single vase with fresh greenery, a bowl of fruit on the kitchen island.
Use the rule of thirds: nightstand gets a lamp, a small stack of books, and one decorative item. Coffee table gets a tray, a candle, and one plant. Kitchen counter gets the fruit bowl and a clean cutting board, and that’s it.
Rule of thumb: every surface should have intent. If you cannot say what an object is doing on the table, it shouldn’t be there.
If a room ends up feeling too empty after decluttering, virtual staging can refurnish it with neutral, photo-ready furniture without you buying or renting a single piece.
Step 10: Photograph the Result
Schedule the listing shoot at the brightest time of day for each room (morning for east-facing, afternoon for west-facing) and turn on every interior light. Open every blind. Do a final pre-shoot walk-through and clear anything that crept back: coffee mug on the counter, dog leash by the door, charging cable on the nightstand. Well-lit decluttered rooms photograph best, and you can use AI lighting enhancement to brighten any shots that came out too dim.
Take photos at chest height (about 48 inches), not eye level — chest height makes rooms look more spacious. Shoot from corners to capture maximum visible floor and depth.
Common mistake: shooting the home before decluttering “to compare.” The cluttered photos will not sell the house. Skip straight to the clean shoot.
What to Do With All the Stuff
A real declutter generates a lot of stuff, and most sellers stall here because they have not decided where it goes. Make the call before you start.
| Category | Where it goes | Notes |
|---|---|---|
| Donate | Goodwill, Salvation Army, Habitat ReStore | Schedule a pickup for large loads; takes 1-2 weeks. |
| Sell | Facebook Marketplace, Craigslist, OfferUp | Furniture moves fastest in the first 48 hours of listing. |
| Store off-site | PODS, public storage unit, rented garage | $100-300/mo; cheaper than 3-5% of sale price lost to clutter. |
| Store with family | Parents’ basement, sibling’s garage | Free, but be specific about timeline (60-90 days). |
| Dispose | Bagster, junk hauler, dump run | Broken, expired, or unsellable items only. |
The off-site storage unit is the secret weapon. A small unit for two months costs less than a single mortgage payment and lets you remove 30-50% of your stuff without making donate/sell decisions under listing-deadline pressure.
If clutter keeps creeping back as you work through rooms, the Property Brothers’ breakdown of why most decluttering doesn’t stick — and the system they use on listings — is worth ten minutes:
Already-Listed Photos? AI Can Declutter Them Digitally
Sometimes the photos are already taken. Maybe the photographer came before you finished the purge, or maybe the listing went live underperforming and you need a fast refresh without a reshoot. This is where AI changes the math.
BrightShot’s AI photo declutter tool lets you remove furniture, personal items, and clutter from existing listing photos in seconds. Upload the photo, brush over what you want gone (the exercise bike in the bedroom corner, the laundry hamper next to the dresser, the toy bin in the playroom), and the AI rebuilds the background behind it. The output looks like the room was photographed without the clutter in the first place.
This is most useful in two scenarios: when you cannot physically remove the item (tenant furniture in a still-occupied rental, a piano nobody wants to move, a bulky mobility aid), and when reshooting costs $300-600 plus another scheduling round. Decluttering 10-15 photos digitally takes about 20 minutes total and runs a few dollars per image instead.
It is not a substitute for physically decluttering before showings — buyers will still walk through the door and see whatever is actually there. But it is a real shortcut for the listing gallery, which is what 90% of buyers see first. Pair it with virtual staging to refurnish empty-looking rooms after the digital declutter, and you have a complete photo-prep workflow. See pricing for per-listing cost.
Frequently Asked Questions
How long does it take to declutter a home for sale?
For a typical 2,000 sq ft single-family home, plan on 2-4 days of focused work spread over a weekend or two. Larger homes (3,500+ sq ft) or sellers with significant downsizing volume should budget a full week. Hiring a decluttering service compresses the timeline to 1-2 days but adds $500-2,000 in cost.
What should you definitely remove before listing?
The non-negotiables: all family photos, religious iconography, political signage, college and sports memorabilia, exercise equipment in non-gym rooms, kids’ artwork on the fridge, personal hygiene products on bathroom counters, more than one small appliance per kitchen counter zone, pet beds in main living areas, and the contents of any closet beyond 50% capacity.
Do I need to remove all the furniture?
No. Empty rooms photograph worse than staged rooms because buyers cannot judge scale. Keep the major pieces — bed, sofa, dining table, primary chairs — and remove the secondary pieces: extra accent chairs, overflow bookshelves, exercise equipment, oversized desks, and anything visibly worn. If a room ends up feeling too empty, virtual staging can refurnish it digitally.
Can I declutter photos after they’re taken?
Yes. AI photo decluttering tools remove furniture, clutter, and personal items from existing photos in seconds, far faster and cheaper than reshooting. This is especially useful when the home is still occupied (tenant furniture, belongings that cannot be moved for the shoot) or when the listing is already live and underperforming.
Do decluttered homes really sell faster?
Yes. Industry data consistently shows decluttered, depersonalized homes sell 27% faster on average and command 3-5% higher offers than comparable cluttered listings. Buyers form first impressions in seconds, and visual clutter signals “small, dated, neglected” even when the home is none of those things.
Is it worth hiring a decluttering service?
For most sellers, no — the work is self-directed once you have a checklist. A service earns its fee for large estates with significant downsizing, sellers with mobility or time constraints, or sellers who have lived in the home for 20+ years and have an emotional barrier to letting go. Expect to pay $500-2,000 for a typical home.
Decluttering Is the Cheapest Way to Add Value
If you do nothing else before listing, do this. Properly declutter your home for sale, depersonalize aggressively, and stage what is left intentionally — and you will reliably add 3-5% to your sale price for the cost of a weekend and a small storage unit. That is a better return than almost any cosmetic upgrade short of fresh neutral paint.
Work through the 10 steps in order, and if your photos have already been taken with clutter in frame, lean on BrightShot’s AI declutter tool to fix the gallery without a reshoot. A clean home photographs better, shows better, and sells faster.


