In a competitive real estate market, the margin between a listing that sits and one that sells is often determined by the first digital handshake: the photos. Buyers swipe through dozens of properties, forming an opinion in mere seconds. A vacant room feels cold and uninviting, clutter suggests a lack of space, and poor lighting can make a beautiful home feel dreary. The story your images tell from the outset directly impacts your success.
This is precisely why seeing a compelling staging before and after is so powerful. It’s not just about aesthetics; it’s about demonstrating potential and helping buyers visualize a future they want. No longer dependent on expensive physical staging or perfect weather, agents and photographers can now instantly elevate a property’s appeal. With AI tools like BrightShot, you can transform a property from its current state to its ideal presentation, converting passive viewers into engaged prospects.
This article provides a practical playbook, showcasing 8 specific staging transformations. We’ll go behind the scenes to break down exactly how each edit was achieved, the measurable impact on metrics like views and sales, and the simple steps you can take to reproduce these results. You will learn actionable strategies for:
- Virtual staging and style swaps
- Intelligent decluttering and object removal
- Lighting correction and day-to-dusk conversions
- Perspective optimization and view enhancement
- AI-powered video walkthroughs
Get ready to see how a strategic approach to property visuals can drive more showings, secure better offers, and close deals faster.
1. Virtual Staging: Turning Empty Voids into Irresistible Homes
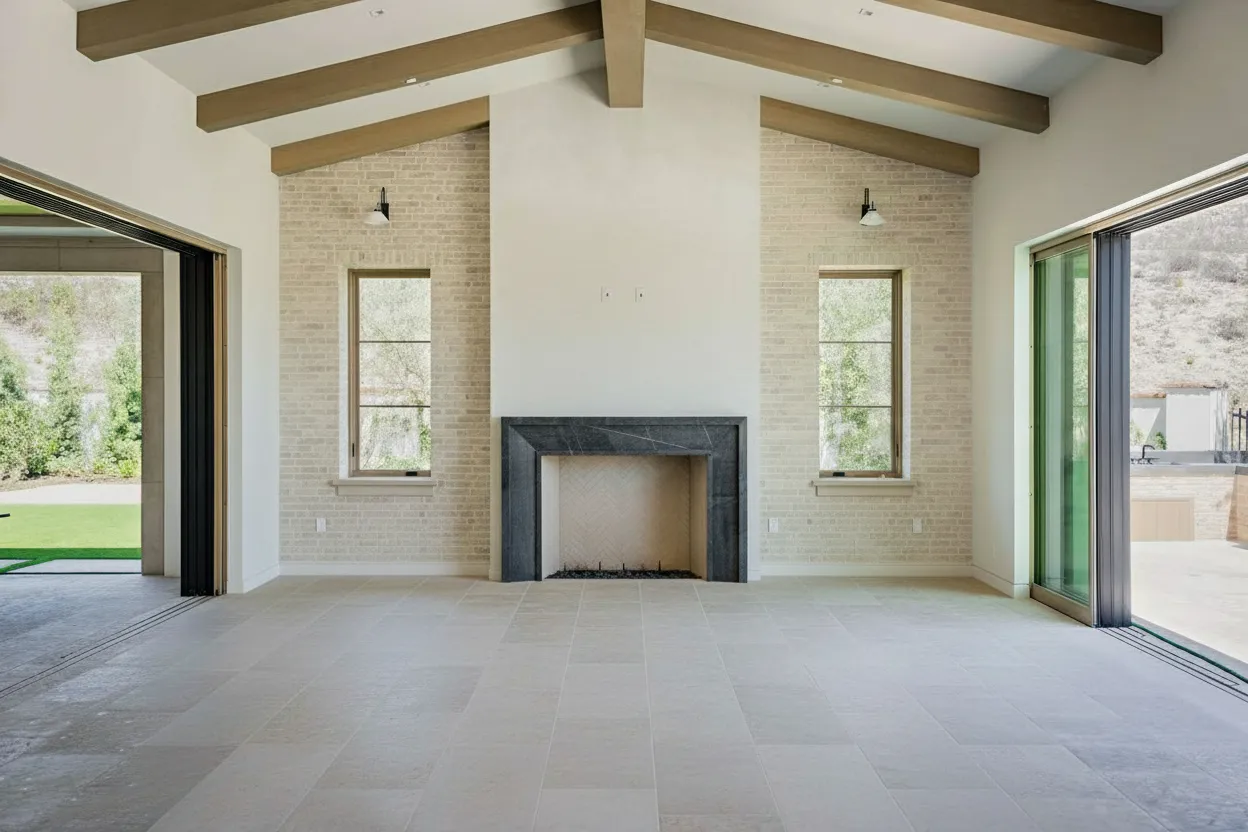
Vacant properties present a significant marketing challenge known as the ‘imagination gap.’ Buyers often struggle to visualize scale, furniture layout, and how an empty shell can become a home. This is where virtual staging offers a powerful solution, bridging this gap instantly and cost-effectively.
Unlike traditional staging, which involves high rental costs and logistical coordination, AI-powered platforms can digitally furnish an entire property in minutes. The process uses photorealistic assets that match the home’s character and target demographic. This first staging before and after example showcases a standard, empty living room that is clean but uninspiring. Its transformation into a warm, contemporary living space invites buyers to picture their life unfolding there. The objective is not just to fill the room, but to tell a story of comfort, style, and possibility.
Strategic Analysis: From Empty to Emotionally Engaging
The ‘before’ image, while professionally shot with good lighting, lacks emotional resonance. It’s a blank canvas that forces buyers to do the mental heavy lifting of furnishing and decorating. The ‘after’ image completely changes the narrative.
- Defines the Space: The staged furniture clearly defines the living room’s purpose and demonstrates its capacity. The area rug anchors the seating arrangement, while the sofa and chairs show a comfortable conversation area.
- Adds Warmth & Texture: Soft elements like the rug, throw pillows, and curtains introduce warmth and texture, making the room feel cozy and lived-in.
- Creates a Focal Point: The strategic placement of art above the sofa draws the eye and adds a touch of personality, preventing the room from feeling generic.
Key Insight: Virtual staging is most effective when it adds not just furniture, but also a lifestyle. The goal is to create an aspirational scene that resonates emotionally with the target buyer, making them feel “at home” before they ever step inside.
How to Replicate This Success
Agents and photographers can achieve similar results by focusing on a few key steps. Using a tool like BrightShot’s AI Staging, the workflow is direct and fast.
- Select a Style: Choose a furnishing style that aligns with the property’s architecture and the likely taste of your target buyer (e.g., Modern Farmhouse, Scandinavian, Mid-Century Modern).
- Define the Room Type: Clearly label the space (e.g., “Living Room,” “Primary Bedroom”) to guide the AI in selecting appropriate furniture.
- Generate & Refine: Let the AI generate an initial design. If needed, use prompts to refine the output, such as “add a large plant in the corner” or “use a neutral color palette” to perfect the scene.
This approach provides a compelling staging before and after comparison that dramatically improves a listing’s online appeal, attracting more views and encouraging serious inquiries.
2. Lighting Correction and Day-to-Dusk Transformation
Poor lighting is one of the fastest ways to kill buyer interest. Photos taken on overcast days or with unflattering interior lights can make a property feel dark, drab, and smaller than it really is. AI-powered lighting correction and day-to-dusk conversions fix this problem, creating a warm, inviting atmosphere that commands attention and elevates a home’s perceived value.
This staging before and after technique is especially powerful for exterior shots. A standard daytime photo shows the property, but a twilight or “dusk” version tells a story. It highlights architectural details with glowing windows, showcases landscape lighting, and creates an ambiance of sophisticated comfort. This transition from a simple daytime snapshot to a dramatic twilight portrait can significantly boost curb appeal and emotional connection.

Strategic Analysis: From Drab Daylight to Dramatic Dusk
The ‘before’ image of a home on a cloudy day is purely functional. It communicates what the house looks like but fails to generate excitement. The ‘after’ day-to-dusk conversion transforms it into a premium marketing asset.
- Creates Instant Curb Appeal: The warm glow from the windows and exterior lights makes the home look welcoming and secure. This single image conveys a feeling of returning to a safe, beautiful haven.
- Highlights Premium Features: Landscape lighting, window placements, and architectural lines become focal points, suggesting a high-end, well-maintained property.
- Stands Out in Listings: In a sea of bright, daytime photos, a stunning twilight shot is a pattern interrupt. It grabs a buyer’s attention, making them pause and look closer.
Key Insight: Day-to-dusk conversion is more than a cosmetic filter; it’s an emotional trigger. It sells a lifestyle of elegance and tranquility, helping buyers envision evenings spent in their beautiful new home.
How to Replicate This Success
Achieving a professional-grade twilight photo no longer requires a photographer to wait for the perfect 15-minute window at sunset. With an AI tool like BrightShot, the process is quick and effective.
- Upload a Quality Daytime Photo: Start with a sharp, well-composed exterior shot. The AI works best with clear source images.
- Apply the Day-to-Dusk Feature: Select the lighting enhancement or day-to-dusk function. The AI automatically replaces the sky, adjusts ambient light, and “turns on” the lights inside and outside the home.
- Perform a Quality Check: Review the image to ensure the lighting looks natural and consistent. Confirm that shadows and reflections align with the new light source for a believable result.
This method provides a show-stopping staging before and after that can serve as the hero image for a listing, driving higher click-through rates and making a memorable first impression.
3. Intelligent Decluttering and Object Removal
Seller-occupied homes often present a unique problem: personal clutter. While lived-in, these spaces can be filled with family photos, personal memorabilia, and daily life items that distract buyers and prevent them from seeing the property’s full potential. Intelligent decluttering uses AI to digitally remove these unwanted objects, creating a clean, depersonalized canvas.
Unlike time-consuming manual photo editing, AI-powered tools can instantly erase everything from kitchen counter clutter to distracting power lines on an exterior shot. This staging before and after example shows a cluttered kitchen counter that obscures the available space. The transformation removes every distracting item, showcasing the kitchen’s clean lines and ample countertop real estate, allowing buyers to envision their own belongings there.
Strategic Analysis: From Personal Mess to Prime Real Estate
The ‘before’ image is a common sight in occupied listings. It’s authentic to the seller’s life but detrimental to marketing, as it makes the space feel smaller and less organized. The ‘after’ image restores the room’s core value.
- Highlights Key Features: By removing the clutter, the AI edit immediately draws attention to the granite countertops, backsplash, and cabinet quality, which are the true selling points.
- Creates a Sense of Space: The decluttered view makes the counter feel larger and more functional, answering the buyer’s subconscious question, “Is there enough room for my stuff?”
- Removes Emotional Distractions: Personal items create a barrier. Removing them allows buyers to mentally “move in” without feeling like they are intruding on someone else’s life.
Key Insight: Intelligent decluttering isn’t about making a home look sterile; it’s about removing the seller’s story so the buyer can start writing their own. A clean slate is more valuable than a cluttered reality.
How to Replicate This Success
Agents and photographers can easily integrate AI decluttering into their workflow. With a tool like BrightShot, the process is straightforward. For a deeper dive, you can learn how to declutter any room to sell faster.
- Identify Distractions: Pinpoint any items that detract from the property’s features, such as personal photos, pet bowls, or excess countertop appliances.
- Use the Object Removal Tool: Upload the photo and use the AI’s object removal function. The system automatically identifies and erases the items while rebuilding the background contextually.
- Review and Finalize: Check the edited image to ensure the removal is seamless and the lighting remains consistent. The result should look natural, not digitally altered.
This powerful staging before and after technique cleans up a listing’s visual presentation, making it more appealing and helping it attract a wider audience of serious, ready-to-envision buyers.
4. Interior Style Transformation Across Design Aesthetics
A single property rarely appeals to every buyer, as taste in interior design is deeply personal. Style transformation addresses this by showcasing one space in multiple aesthetic variations, such as modern, rustic, or minimalist. This technique demonstrates a property’s versatility, allowing agents to cater to diverse buyer preferences without any physical redecoration.
Instead of presenting a single, fixed look, you can offer a gallery of possibilities. This approach is particularly effective for marketing new developments or properties with broad market appeal. This staging before and after method isn’t about a single change but a series of them, turning one room into several potential homes. For instance, a standard living room can be reimagined with Mid-Century Modern furniture, then again with a cozy Farmhouse feel, expanding its perceived value to different demographics.
Strategic Analysis: From One-Size-Fits-All to Personalized Appeal
The ‘before’ image is a single staged version of a room. While it may be well-designed, it inevitably targets a specific buyer persona, potentially alienating others. The ‘after’ images, presented as a carousel or gallery, multiply the home’s appeal.
- Broadens the Target Audience: By showing the same kitchen in Scandinavian, Industrial, and Traditional styles, you connect with three distinct buyer groups instead of one.
- Overcomes Style Objections: A buyer who dislikes the primary “Modern” staging might fall in love with the “Transitional” alternative, preventing them from dismissing the property outright.
- Highlights Architectural Versatility: This method proves that the home’s core structure can support various lifestyles and design trends, making it a flexible long-term investment.
Key Insight: Style transformation shifts the marketing focus from “this is the home” to “this could be your home.” It empowers buyers by showing them how the space can be adapted to their personal taste, making the property feel more attainable and desirable.
How to Replicate This Success
Agents can use AI tools to quickly generate multiple design variations for a single photo. With a platform like BrightShot and its library of over 80 styles, the process is efficient.
- Upload the Base Photo: Start with a high-quality image of the room, either empty or with existing furniture that will be replaced.
- Select Multiple Styles: Choose 2-4 distinct but appropriate styles. For a suburban home, you might select Modern Farmhouse, Transitional, and Coastal. For a city loft, Industrial, Minimalist, and Luxury Modern would be a better fit.
- Generate and Label: Create each variation and clearly label it in the listing (e.g., “Shown in Scandinavian Style”). Present these images in a comparative gallery or carousel format to make the versatility immediately obvious.
This powerful staging before and after gallery helps buyers see past a single design choice and focus on the home’s true potential.
5. Sky and Lawn Replacement for Enhanced Curb Appeal
The first impression of a property is almost always its exterior. A dull, overcast sky or a lawn with brown, patchy grass can significantly detract from curb appeal, making a listing easy to scroll past. Sky and lawn replacement directly addresses this by digitally swapping subpar outdoor elements for vibrant, picture-perfect alternatives, creating an ideal first impression regardless of weather or season.
This technique is a powerful form of staging before and after for exteriors. Instead of waiting for a perfect sunny day or investing in costly landscaping, agents can instantly improve a property’s hero shot. The “before” image might show a great house under a gloomy sky, while the “after” showcases the same home against a brilliant blue sky with a lush, green lawn, immediately boosting its perceived value and appeal.

Strategic Analysis: From Drab to Dramatic
The initial exterior photo, while accurately representing the property on a given day, fails to capture its full potential. It presents a reality that is uninspiring and fails to stop the scroll. The edited ‘after’ image constructs a more compelling and aspirational narrative.
- Creates an Emotional Connection: A bright, sunny day evokes feelings of happiness and positivity. Replacing a gray sky with a blue one instantly makes the home feel more welcoming and cheerful.
- Highlights the Property, Not the Flaws: A patchy lawn draws the eye to imperfections. By creating a uniformly green lawn, the focus shifts back to the home’s architecture and features.
- Establishes Aspirational Living: A dramatic sunset or a perfect summer day suggests an ideal lifestyle, helping buyers envision enjoying the outdoor space.
Key Insight: Curb appeal is about selling the potential of a home. Sky and lawn replacement is not about deception; it’s about presenting the property in its best possible light, just as one would by cleaning or decluttering the interior. Always disclose these edits in the listing description.
How to Replicate This Success
Achieving a professional and realistic exterior enhancement is straightforward with tools designed for this purpose. Using a platform like BrightShot, the process is quick and effective.
- Upload the Exterior Photo: Start with a well-composed, high-resolution image of the property’s exterior, preferably taken at eye-level from the curb.
- Select Enhancement Options: In the editor, choose the “Sky Replacement” and “Lawn Enhancement” features. Select a sky that matches the time of day and lighting in the original photo (e.g., a blue sky for a daytime shot, not a sunset).
- Adjust and Refine: Apply the lawn greening feature subtly to avoid an artificial look. The goal is a vibrant but believable lawn. If you need more specific guidance, an AI lawn replacement guide can offer detailed tips.
This simple staging before and after process transforms an average exterior shot into a captivating lead photo, proven to increase clicks, viewer engagement, and showing requests.
6. Perspective View Swaps and Room Angle Optimization
Sometimes, the best staging isn’t about adding furniture but about changing how a buyer sees the room itself. Wide-angle lenses, while necessary for capturing tight spaces, often create distortion that makes walls bend and rooms feel unnatural. Perspective optimization uses AI to correct these issues, presenting a space from a more flattering and realistic vantage point without ever repositioning the camera.
This technique is a subtle yet powerful form of a staging before and after transformation. It can straighten tilted horizons, adjust perceived ceiling height, and fix the “fish-eye” effect common in photos of small bathrooms or hallways. The goal is to correct the camera’s necessary lies, presenting the room as the human eye would perceive it-spacious, balanced, and architecturally sound. This removes subconscious visual friction for buyers, allowing them to focus on the home’s features rather than a distracting, distorted photo.
Strategic Analysis: From Distorted to Dimensionally Accurate
The ‘before’ image often suffers from common photographic artifacts. A bathroom might look warped due to a wide-angle lens, or a hallway’s converging lines might make it feel long but cramped. The corrected ‘after’ image restores a sense of order and realism.
- Corrects Unnatural Lines: AI identifies and straightens bent vertical lines, such as door frames and wall corners, that are common with wide-angle distortion. This immediately makes the space feel more stable and professionally presented.
- Balances Proportions: By subtly adjusting the vertical perspective, the technology can make a ceiling-heavy room appear less cramped or a floor-dominant shot feel more open and airy.
- Creates a More Inviting View: Optimized angles can subtly guide the viewer’s eye toward a key feature, like a beautiful window or custom tilework, that was previously lost in the distorted composition.
Key Insight: Perspective correction isn’t about deceiving the buyer by exaggerating space. It’s about removing the technical limitations of photography to present a truer, more appealing representation of the property’s actual dimensions and feel.
How to Replicate This Success
Achieving a clean, architecturally correct look is straightforward with the right tools. Editors like BrightShot’s Perspective Optimization are designed for this exact purpose.
- Identify Problem Photos: Scan your gallery for images with obvious distortion-tilted horizons, curved walls, or converging verticals in small rooms.
- Apply Automated Correction: Upload the image and apply a one-click perspective correction feature. The AI analyzes the image geometry and automatically straightens lines.
- Fine-Tune Manually (If Needed): For complex shots, make minor manual adjustments to the vertical or horizontal alignment until the image looks natural and balanced.
This approach delivers a superior staging before and after result by improving the foundational quality of the image, ensuring every photo in your listing is as accurate and appealing as possible.
7. Immersive 360° Virtual Tour Creation from Still Photos
Static photos show buyers a property, but immersive 360° tours let them experience it. This technology stitches together multiple high-resolution still images to create an interactive digital walkthrough. Buyers can explore a home from any device, moving from room to room and looking in every direction, as if they were physically there. This approach is a game-changer for attracting remote buyers and pre-qualifying leads.
This powerful staging before and after isn’t about changing furniture; it’s about transforming the viewing experience itself. The ‘before’ is a standard, clickable photo gallery that offers a limited, two-dimensional perspective. The ‘after’ is a fully navigable virtual space that keeps buyers engaged up to five times longer, giving them the confidence to take the next step. A luxury home, for example, saw 58% more qualified inquiries after implementing a 360° tour.
Strategic Analysis: From Passive Viewing to Active Exploration
A traditional photo gallery guides a buyer’s gaze, but a virtual tour puts them in the driver’s seat. It transitions the experience from passive observation to active, self-directed exploration.
- Creates a Sense of Flow: Unlike a series of disconnected photos, a tour demonstrates the property’s layout and how rooms connect, helping buyers understand the home’s flow.
- Builds Buyer Confidence: The transparency of a 360° tour builds trust. It allows buyers to inspect details up close, look inside closets, and get a true feel for the space, reducing uncertainty.
- Boosts Engagement: Interactive content holds attention far better than static images. This increased time-on-page signals strong interest to both agents and listing portals.
Key Insight: The most significant advantage of a 360° tour is its ability to pre-qualify serious buyers. By allowing for a thorough digital inspection, it ensures that those who book a physical showing are already highly invested and well-informed.
How to Replicate This Success
Creating a professional-grade tour from still photos has become remarkably straightforward with modern tools. Using a service with automated 360° tour generation can produce impressive results quickly.
- Capture Complete Coverage: Take photos of each room from multiple angles. Ensure consistent lighting across all shots to create a seamless final product. Don’t forget functional areas like closets and laundry rooms.
- Upload and Organize: Upload the high-resolution source images to your chosen platform. Arrange the scenes logically to create an intuitive and natural navigation path through the property.
- Test and Publish: Before going live, thoroughly test the tour on both desktop and mobile devices to confirm smooth transitions and a responsive user experience.
For those wanting to compare options, you can learn more about the best 360 virtual tour software to find the right fit. This method provides a compelling staging before and after that elevates a listing from a simple gallery to an immersive event.
8. AI-Generated Video Walkthroughs with Cinematic Overlays
Static images are the foundation of property marketing, but video content is what captures attention and drives engagement on social media. The traditional barrier to creating property videos has been the time and skill required for filming and editing. AI-powered tools now automate this process, converting a sequence of high-quality photos into a dynamic video walkthrough.
This technique goes beyond a simple slideshow. AI adds smooth “Ken Burns” style pans and zooms, seamless transitions, and professionally designed graphic overlays. The result is a cinematic tour that guides viewers through the property. The ‘before’ state is a folder of still photos, and the ‘after’ is a polished, shareable video that tells a compelling visual story. This staging before and after process transforms static assets into a high-performing marketing tool, perfect for platforms like Instagram Reels and TikTok.
Strategic Analysis: From Still Images to Storytelling Motion
A gallery of photos requires the buyer to mentally connect the dots, figuring out the home’s layout and flow. A video walkthrough does this work for them, creating a more immersive and intuitive experience.
- Creates a Narrative Flow: By arranging photos in a logical room-to-room sequence, the video builds a mental map for the viewer, helping them understand how spaces connect.
- Boosts Social Engagement: Video content consistently outperforms static images on social media algorithms. An AI-generated walkthrough can achieve thousands of views, expanding a listing’s reach exponentially.
- Adds a Professional Sheen: Cinematic overlays with branding, property details, and calls-to-action give the video a broadcast-quality feel, elevating the agent’s brand perception.
Key Insight: The value of an AI-generated video is its ability to turn a passive viewing experience into an active one. It guides the buyer’s journey through the home, building excitement and making the property feel more tangible and desirable.
How to Replicate This Success
Creating these engaging videos is straightforward with a tool that automates the heavy lifting. Using a feature like BrightShot’s cinematic video generator simplifies the entire workflow.
- Plan the Photo Sequence: Before uploading, arrange your photos in the order you want them to appear, mimicking a natural walk through the front door to the backyard.
- Apply a Branded Template: Select a video template that includes your logo, brand colors, and contact information for a consistent and professional look across all your listings.
- Generate and Caption: The AI will produce the video with smooth transitions and motion effects. Use the AI caption generator to add text that highlights key features for each room shown.
This approach provides a powerful staging before and after from a collection of photos to a viral-ready video, dramatically increasing a listing’s visibility and attracting a modern, digitally-native audience.
Before-and-After Staging: 8-Point Comparison
| Transformation | 🔄 Complexity (process) | ⚡ Resources (speed/efficiency) | 📊⭐ Expected outcomes (results/quality) | 💡 Ideal use cases (tips) | ⭐ Key advantages |
|---|---|---|---|---|---|
| Virtual Staging of Empty Homes for Faster Sales | 🔄 Low — AI-based, simple workflow | ⚡ Low — single photos, fast turnaround | 📊↑ Inquiries ~73%, sells ~18% faster | 💡 Vacant/new construction/foreclosures; list same-day | ⭐ Cost-effective, scalable, multiple style tests |
| Lighting Correction and Day-to-Dusk Transformation | 🔄 Low — automatic correction + tuning | ⚡ Low — one-photo edits, quick batch runs | 📊↑ Engagement +34%; dusk shots ↑ evening inquiries 28% | 💡 Use for curb appeal & overcast photos; apply first | ⭐ Enhances warmth/appeal without reshoot |
| Intelligent Decluttering and Object Removal | 🔄 Low–Moderate — context-aware editing | ⚡ Low — fast one-click with occasional fine-tune | 📊↑ Online engagement +41%; showings +23% | 💡 Target high-traffic interiors and visible clutter | ⭐ Removes distractions quickly; cheaper than cleanup |
| Interior Style Transformation Across Design Aesthetics | 🔄 Moderate — multi-style generation | ⚡ Moderate — multiple variants per photo | 📊↑ Time on page +2.5 min; 54% engage with styles | 💡 Use 2–4 complementary styles; label each clearly | ⭐ Broadens buyer appeal; design exploration sans staging |
| Sky and Lawn Replacement for Enhanced Curb Appeal | 🔄 Low–Moderate — lighting consistency required | ⚡ Low — single-photo, same-day fixes | 📊↑ Showings +37%; thumbnail clicks +44% | 💡 Use realistic skies matching shadows; primary photo only | ⭐ Dramatically boosts first impressions without landscaping |
| Perspective View Swaps and Room Angle Optimization | 🔄 Moderate — geometry & realism balancing | ⚡ Low — single-photo corrections, apply early | 📊↑ Perceived size +8–12%; small properties +23% showings | 💡 Correct obvious distortion; keep dimensions plausible | ⭐ Fixes lens errors, makes spaces appear larger without reshoot |
| Immersive 360° Virtual Tour Creation from Still Photos | 🔄 High — stitching, navigation, analytics setup | ⚡ High — many photos, careful capture required | 📊↑ Page views +78%; tour engagement ~3+ minutes | 💡 Ideal for remote/international buyers and luxury listings | ⭐ Deep engagement, pre-screens buyers, differentiates listing |
| AI-Generated Video Walkthroughs with Cinematic Overlays | 🔄 Moderate — sequencing + template customization | ⚡ Moderate — good photo coverage; quick generation | 📊↑ ~12x more engagement vs photos; strong social reach | 💡 Plan shot sequence; create multiple lengths for platforms | ⭐ Highly shareable, professional video quality fast |
Your Blueprint for Faster Sales and Higher Offers
The collection of staging before and after examples we’ve explored moves beyond simple aesthetics. It serves as a practical blueprint for influencing buyer perception, creating emotional resonance, and ultimately, accelerating the sales cycle. The transformations from an empty shell to a warm home, or from a dreary day to a stunning twilight, are not just visual tricks; they are strategic marketing decisions with a direct impact on your bottom line.
What we’ve seen is that selling a property’s potential is far more effective than selling its current reality. Whether it’s an investor looking for a turnkey rental or a family searching for their forever home, buyers are purchasing a vision of their future life. Your listing photos are the primary medium for communicating that vision.
Synthesizing the Core Strategies
Reviewing the eight distinct techniques, several core principles emerge as critical for success. Mastering these concepts will give you a significant advantage in any market.
- Solve the “Vision Gap”: Empty rooms, cluttered spaces, or poor lighting create a “vision gap” that many buyers cannot bridge on their own. Virtual staging, intelligent decluttering, and lighting corrections directly address this by presenting a clear, aspirational, and move-in-ready picture.
- Maximize First Impressions: Curb appeal, established through sky and lawn replacements, and the initial hero shot of a perfectly lit living room are non-negotiable. These initial images determine whether a buyer clicks for more details or scrolls past to your competition.
- Control the Narrative: Don’t let a room’s awkward layout or a cloudy day dictate the story of the property. Perspective swaps and Day-to-Dusk transformations empower you to control the narrative, highlighting a space’s best features and creating a memorable, premium feel.
These aren’t isolated tactics but interconnected components of a comprehensive visual marketing strategy. By thoughtfully applying these methods, you are no longer just a listing agent; you are the property’s first and most important storyteller.
From Insights to Action: Your Next Steps
The difference between a property that sells in a week and one that lingers for months often comes down to the quality of its presentation. The “staging before and after” effect is your most powerful tool for making sure your listings fall into the first category.
Moving forward, your action plan should be direct and focused:
- Audit Your Next Listing: Before scheduling a photoshoot, critically evaluate the property. Identify the rooms that would benefit most from virtual staging. Pinpoint any areas needing decluttering or object removal. Note the curb appeal and lighting challenges.
- Experiment with One New Technique: If you’ve only used virtual staging, try a Day-to-Dusk edit on your next hero shot. If you’ve been removing clutter, experiment with a sky replacement to make the exterior pop. Small, incremental additions to your skillset will build confidence and expand your marketing toolkit.
- Measure the Impact: Don’t just make the changes; track the results. Monitor the increase in listing views, the number of saved favorites, and the volume of showing requests. Connecting these visual upgrades to tangible business metrics will validate the investment and prove the ROI to your clients.
Ultimately, the goal is to shift from a reactive to a proactive marketing mindset. Instead of just documenting what a property is, you have the tools to showcase what it can be. This strategic approach not only attracts more qualified buyers but also justifies higher asking prices, positioning you as a premium agent who delivers superior results. Your next record sale is waiting; it’s time to build its visual story.
Ready to apply these strategies and create your own stunning staging before and after results? BrightShot provides the AI-powered tools to perform virtual staging, object removal, day-to-dusk edits, and more in just a few clicks. Stop just listing properties and start launching them with magazine-quality visuals by visiting BrightShot today.