Think of editing your real estate photos as a four-stage journey. It starts with prepping your RAW images, moves into making those crucial corrections to light and perspective, then gets exciting with AI enhancements like virtual staging, and finally, wraps up with exporting the finished shots for the MLS and marketing. When you get this workflow down, you’re not just tweaking photos—you’re creating powerful sales tools that stop buyers in their tracks.
Why Pro Photo Editing Sells Homes Faster

Let’s be honest, the first showing isn’t at the open house anymore. It happens on a phone screen, probably while someone is waiting for their coffee. Those first few images are your one shot at a great first impression, and raw, unedited photos simply don’t cut it. Professional editing isn’t just a nice-to-have; it’s a core part of any serious sales strategy.
I’ve seen it countless times—the difference between a raw photo gallery and a professionally edited one is night and day. It’s what separates a listing that gets scrolled past from one that earns a click, a save, and a share. Good editing doesn’t just make a house look prettier; it tells a story and helps a buyer form an emotional connection before they even step inside.
The Tangible Impact of Edited Photos
Great photos don’t just feel better, they perform better. The data doesn’t lie: properties with high-quality images get better results across the board. The numbers are pretty compelling.
Listings that feature top-tier edited images get 118% more online views. They also tend to sell 18% faster within the first six months on the market. Even better, these homes often close 39% closer to the list price, which can mean an extra $19,000 per sale on an average home. If you want to dive deeper into the data, you can see the full breakdown of these editing statistics on Phixer’s blog.
It’s not just about a quicker sale; it’s about getting the most value out of the property.
The table below summarizes just how much of a difference professional editing can make to a listing’s key metrics.
Impact of Professional Editing on Listing Performance
| Metric | Impact of High-Quality Editing |
|---|---|
| Online Views | Captures immediate attention, leading to significantly more clicks and engagement on listing portals. |
| Perceived Property Value | Bright, sharp, and well-composed images make a home appear more valuable and well-maintained. |
| Days on Market | Increased buyer interest from stunning photos often leads to a faster sale, reducing holding costs. |
| Sale-to-List Price Ratio | A higher perceived value and more competition can result in offers closer to the asking price. |
| Emotional Connection | Helps buyers visualize themselves in the space, turning a property into a potential home. |
As you can see, the benefits are clear and directly impact the agent’s and seller’s bottom line.
This isn’t about making a property look like something it’s not.
The goal of editing is to present a home at its absolute best, accurately and ethically. It’s about removing distractions—like poor lighting or clutter—so the property’s true potential can shine through.
How Editing Influences Buyer Psychology
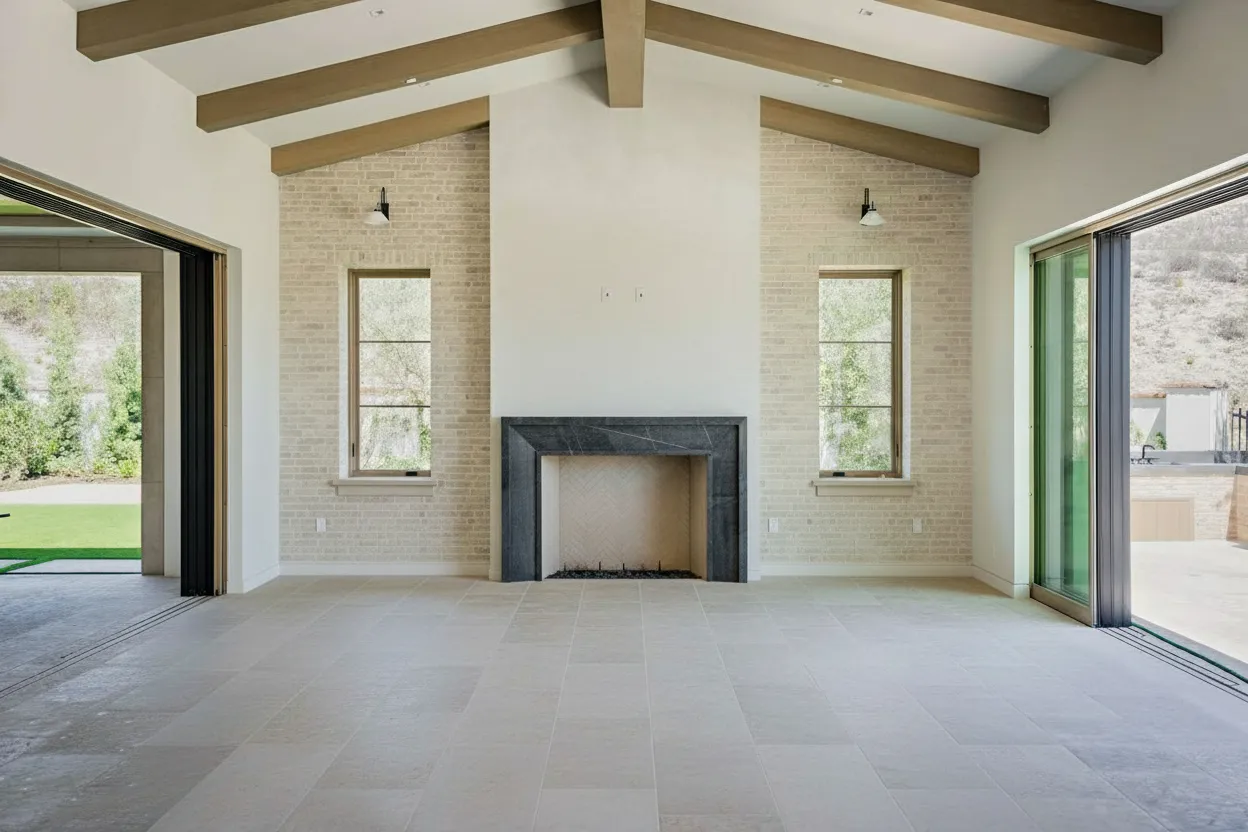
Think about the difference between an empty room and a virtually staged one. An empty room is a puzzle. It raises questions about scale and function. A well-staged room, on the other hand, provides an immediate answer, showing buyers exactly how the space can be lived in. It removes the guesswork.
This is where modern editing tools have really changed the game for photographers and agents.
AI-powered platforms like BrightShot have made these advanced edits incredibly accessible. You can now virtually stage a vacant home, declutter a messy room, or swap a gray, overcast sky for a perfect sunset. These aren’t just minor fixes; they’re strategic moves designed to hook a wider audience and build a powerful first impression. In this guide, I’ll walk you through exactly how to do it all, from the basic corrections to the advanced AI tricks that deliver real results.
Building Your Foundational Editing Workflow

Every great real estate photo starts with a solid foundation. Before you even think about creative enhancements, you need to establish a clean, technically sound canvas. This prep work is what truly separates polished, professional images from amateur snapshots and makes every edit that follows far more effective.
If there’s one non-negotiable rule in this business, it’s this: shoot in RAW. JPEGs might save space, but they are compressed files where the camera has already made irreversible decisions about color and exposure. RAW files, on the other hand, contain all the raw sensor data, giving you the ultimate flexibility to rescue details from dark shadows or pull back blown-out highlights in a window.
Think of it this way: a JPEG is a cake someone else already baked. You can add frosting, but you can’t change the recipe. A RAW file gives you all the flour, sugar, and eggs to bake it exactly how you want.
Organize Your Files Before You Start
A single property shoot can easily leave you with hundreds of files. If you don’t have a system, you’ll be drowning in a folder of images all named something like “IMG_4079.CR3.” Trust me, a logical folder structure is your best friend for an efficient workflow.
I’ve found a simple, effective structure works best. Create a main folder for each property, then use subfolders to keep everything tidy.
- Property Address (e.g., 123 Main Street)
- 01_RAW: All your original, untouched files go straight in here. This is your digital negative vault.
- 02_EDITED: This is for your finished, color-corrected, and retouched images.
- 03_EXPORT: Here, you’ll save the final, resized images ready for the MLS, Zillow, and print.
This setup prevents you from ever accidentally overwriting an original file and makes it a breeze to find exactly what you need, especially when you start batch processing.
Making Foundational Corrections
With your files neatly organized, it’s time to tackle the three critical adjustments that form the bedrock of any professional edit: lens distortion, perspective, and initial exposure. Mastering these basics is essential to learning how to edit real estate photos that sell.
Lens Distortion Correction: Wide-angle lenses are a must for capturing the scale of a room, but they often introduce a slight “fisheye” curve to straight lines. Thankfully, this is an easy fix. Modern editing software like Adobe Lightroom has built-in lens profiles that automatically correct this based on your camera and lens combination. It’s usually a one-click fix that instantly makes your images look more true-to-life. If you really want to master the fine details, it’s worth learning how to properly edit photos with Photoshop for truly flawless results.
Perspective Correction: Next up, you need to make sure all your vertical lines are perfectly straight. When you tilt your camera even slightly, vertical lines like door frames and walls can appear to lean inward or outward, an effect called keystoning. Use your software’s transform or upright tools to fix this. An image with perfectly plumb vertical lines feels grounded, spacious, and professionally executed.
Getting the perspective right is a subtle but powerful signal of quality. It tells potential buyers that the photos were taken with care and professionalism, building trust from the very first image they see.
Initial Exposure and Contrast: Before getting lost in the details of color grading, get a solid baseline exposure. The goal here isn’t perfection, just a balanced starting point. Brighten the image enough to see detail everywhere, and add a little contrast to give it some life. Nail your in-camera settings first, and this step becomes much easier; our guide on real estate photography camera settings is a great resource for that. These initial tweaks prepare your image for the more advanced, impactful edits that will make it shine.
Mastering Light and Color Correction

After you’ve straightened out your perspectives, it’s time to dive into the two elements that truly sell a photo: light and color. Get these right, and you’re more than 90% of the way to an image that stops scrollers in their tracks and helps a property feel like a home.
This is arguably the most critical stage of the whole process. Unedited photos often suffer from a classic set of problems—dark, gloomy corners paired with windows so bright they’re just white voids. On top of that, you might see a weird yellow or blue tint from the indoor lighting. These issues can make a stunning space look drab and uninviting, but thankfully, they’re entirely fixable.
Blending Exposures for Flawless Lighting
One of the toughest scenarios we face is a room with a huge dynamic range. Think of a living area with gorgeous, sun-drenched windows and a cozy, darker interior. A single camera shot just can’t capture both extremes well. This is exactly where exposure blending, the technique behind High Dynamic Range (HDR) photography, becomes your best friend.
By bracketing your shots—taking one underexposed, one normal, and one overexposed—you grab all the visual information from the brightest highlights to the deepest shadows. In editing, you can then merge these layers. The process lets you combine the perfectly exposed interior from one photo with the stunning outdoor view from another, creating a single, natural-looking image. For a deeper dive, our guide on HDR for real estate photography breaks it all down.
Here’s how I think about each shot in a bracketed set:
- Underexposed Shot: This is your window-saver. It captures all the detail and color outside that would otherwise be blown out.
- Normal Shot: This is your foundation. It gives you a solid mid-range exposure for the main part of the room.
- Overexposed Shot: This is your shadow-finder. It pulls out all the detail hiding in the darkest parts of the room.
Most modern editing software, including platforms like BrightShot, can automatically merge these exposures for you. The result is a balanced photo that looks just like what you’d see in person. It’s a much better approach than just cranking up the “shadows” slider, which can leave you with a flat, noisy mess.
Nailing the Perfect White Balance
Ever take a photo inside and notice everything has a funky orange or yellow glow? That’s the color temperature of the artificial lights throwing things off. Correcting this is non-negotiable if you want a home to look clean, fresh, and modern. Your goal is simple: make the whites look white.
A clean, accurate white balance is an instant signal of professionalism. It makes colors pop correctly and gives the entire image a fresh, crisp feel that buyers subconsciously associate with a well-maintained home.
Nearly every editing program has a white balance “eyedropper” tool. Just click it on something in the photo that should be neutral gray or white—like a wall, ceiling, or trim—and watch the software instantly correct the color across the entire image. Don’t hesitate to make small manual adjustments afterward to fine-tune the mood. A slightly warmer tone can feel cozy, while a cooler one can come across as sleek and contemporary.
The impact of getting light and color right is huge. Listings with properly lit, color-corrected images see 32% higher engagement on MLS platforms, as balanced tones highlight the features that help sell homes up to 25% quicker. A 2023 survey found that 89% of agents using AI editing reported fewer price reductions, proving that realistic visuals build buyer trust. You can see how this all fits into a larger workflow with this detailed real estate editing checklist.
Enhancing Color for That Final Pop
With your lighting and white balance locked in, the last step is to make your colors sing without looking garish or fake. This is where the saturation and vibrance controls come into play.
- Saturation: This slider boosts the intensity of all the colors in your photo equally. A little goes a long way here; push it too far, and you’ll get an artificial, over-the-top result.
- Vibrance: This is the smarter, more subtle tool. It focuses on boosting the less-saturated colors while protecting the ones that are already strong, which helps keep things like skin tones or bold decor from looking unnatural.
I almost always reach for the vibrance slider first. A gentle nudge is usually all it takes to make the blues in the sky and the greens in the yard look their best. It’s that final touch that transforms a drab kitchen into a bright, welcoming space where buyers can instantly imagine themselves living.
Using AI to Transform Spaces and Tell a Story
With the foundational edits for light, color, and perspective locked in, we can get to the really exciting part of modern photo editing. This is where we move beyond simple corrections and start using AI to create powerful visual stories—transformations that used to be incredibly expensive and time-consuming. These tools are what make a property truly connect with potential buyers on an emotional level.
Empty rooms are tough. For most people, a vacant space feels cold and impersonal, and it’s almost impossible to visualize how their own furniture might fit. This is exactly where AI virtual staging comes in. Instead of presenting a blank box, you can fill a living room with stylish, photorealistic furniture in just a few clicks.
Virtual staging closes that imagination gap for the buyer. It turns an empty room from a question mark into an inviting, tangible vision of a home. They can immediately see the room’s potential, helping them build that crucial connection long before they ever step through the front door.
Creating a Clean Slate With Intelligent Decluttering
Let’s be realistic—most people are still living in their homes when they go on the market. That means family photos on the mantle, kids’ artwork taped to the fridge, and the general clutter of daily life are all fair game during a photoshoot. While those things make a house a home for the current owners, they’re a huge distraction for buyers.
This is a problem that intelligent AI decluttering tools were built to solve. With a click, the software can analyze a photo to find and remove personal items, stray objects, and other visual noise. The AI essentially paints over these distractions, producing a clean, neutral space that allows buyers to picture their own lives there. To see just how effective this is, you can check out how AI-powered decluttering works to create that perfect blank canvas. It’s so much faster than spending hours with the clone stamp tool.
An empty or decluttered home is a blank canvas. It allows a wider range of buyers to project their own aspirations and lifestyle onto the space, which is a powerful psychological trigger in the home-buying process.
This isn’t about misrepresenting the property; it’s about showcasing the house itself, free from the current owner’s personality. Removing temporary, non-structural items is a standard industry practice that helps buyers focus on what matters: the home’s features and layout.
Boosting Curb Appeal With Sky and Lawn Replacement
You only get one chance to make a first impression, and with real estate, that’s almost always the exterior shot. The problem? You can’t control the weather on shoot day. A dreary, overcast sky can make even the most stunning home look flat and uninviting.
This is where AI sky replacement becomes your best friend. You can instantly swap out a washed-out gray sky for a perfect blue one, complete with a few nice clouds. This single, simple change gives the home’s curb appeal a massive boost and makes your hero image pop on a crowded listing page.
On that same note, AI can also do wonders for landscaping. A couple of common tweaks I use all the time include:
- Lawn Greening: Quickly turning patchy, dormant grass into a lush, vibrant green.
- Lawn Repair: Filling in any bare spots to create a more uniform, manicured appearance.
A word of caution here: use these tools ethically. The goal is to show the property’s potential on its best day, not to deceive. Making a lawn a bit greener is a simple enhancement; turning a dirt patch into a PGA-worthy fairway is crossing a line.
Creating Drama With Day-to-Dusk Conversions
There’s a reason twilight photos are so popular. That warm interior glow against a deep blue evening sky just screams luxury and serenity. They make for incredible primary listing photos, but actually capturing them is a real pain—you have a tiny window of perfect light to work with.
Now, AI-powered day-to-dusk tools let you create that same stunning twilight effect from any photo shot during the day. The AI handles everything: adjusting the outdoor light, “turning on” the interior and exterior lights, and adding that signature deep blue sky. This one edit can dramatically elevate a property’s perceived value and make it the star of any online search.
These AI enhancements aren’t just cosmetic fixes; they’re about selling a lifestyle and helping buyers see what’s possible. To take it a step further, an AI social media post generator can even help you create compelling marketing content automatically. By adding these advanced techniques to your workflow, you’re not just editing photos—you’re creating powerful marketing assets that drive clicks, showings, and faster sales.
Developing a Fast and Consistent Workflow
Editing a single photo is one thing. But when you’re facing a full 25-photo gallery for a new listing, that’s a whole different ballgame. The real skill isn’t just making one image look good; it’s processing an entire shoot efficiently without being chained to your desk for hours.
The first big leap in speed comes when you spot the repetitive work. Think about it: you probably used the same camera and lens for most of the shoot. That means foundational fixes, like lens distortion or chromatic aberration, are going to be nearly identical across dozens of images. Applying those same settings manually, photo by photo, is a massive time-waster.
This is exactly why batch processing is a non-negotiable part of any professional’s workflow. Most editing software, like Adobe Lightroom, lets you nail the adjustments on one photo and then sync those settings across a whole group. This one move alone can save you hours on every single project.
Automating With Presets and AI
For years, presets were the gold standard for getting a consistent look. A preset is simply a saved collection of editing settings that you can apply with a single click. They’re fantastic for establishing your signature style and making sure every photo in a gallery shares the same basic color and tonal foundation.
But traditional presets have a major weakness. A preset you perfected for a bright, sunlit kitchen will often make a darker, cozier bedroom look completely wrong. This forces you back to square one, tweaking each photo individually after applying the preset, which eats up all the time you were trying to save.
This is where modern AI platforms like BrightShot come in with a much smarter approach. Instead of just slapping a rigid set of values onto an image, the AI actually analyzes each photo on its own. It understands the context—this room is dark and needs brightening, that sky is gray and should be blue—and makes the right changes automatically. It’s the speed of a preset combined with the intelligence of a human editor.
Your goal is to automate the predictable grunt work. This frees up your valuable time for the creative decisions that actually matter, like perfecting compositions and telling a compelling visual story.
Achieving a Cohesive Gallery Look
Consistency is a hallmark of professionalism. When a potential buyer clicks through a listing and sees a mishmash of different editing styles—some photos warm, some cool, some blown out—it feels amateur and jarring. A cohesive gallery, on the other hand, builds trust and helps the buyer truly immerse themselves in the home.
Whether you rely on presets or an AI tool, the objective is the same: maintain a consistent ‘look’ that ties the entire photo set together.
This chart shows how an AI can handle multiple, complex edits like virtual staging, decluttering, and sky replacement in an automated sequence.

As you can see, tasks that used to be completely separate and incredibly time-consuming can now be chained together, making the whole process much smoother.
Workflow Tips for Maximum Efficiency
To build a truly efficient system, you need to combine batching, smart automation, and a clear vision for your style. Here are a few practical tips I’ve picked up from editing thousands of properties.
-
Edit in Batches by Room: Don’t just edit photos in the order you shot them. Group all the living room shots, all the kitchen shots, and so on. This makes it far easier to apply consistent adjustments to images with similar lighting.
-
Create Your Own Base Presets: Even if you lean on AI, having a few of your own presets for a starting white balance or a basic tone curve can be a great first step before letting the AI handle the heavy lifting.
-
Don’t Over-Process: An efficient workflow is also about knowing when to stop. The goal is to enhance the photo, not create a digital fantasy. Get comfortable leaving some sliders alone.
By developing and sticking to a systematic approach, you can slash your editing time. That time can then be reinvested into finding more clients or other parts of your business, all while you deliver a better, more consistent product.
Finalizing and Exporting: Getting Your Photos Ready for Primetime
You’ve put in the work. The exposure is perfect, the colors pop, and that once-empty living room now looks like a cozy, staged masterpiece thanks to some clever AI. But all that effort can go to waste if you trip at the finish line: the export.
This final step is all about packaging your images for their specific destination. An image for a high-end print brochure needs a completely different set of specs than one for a fast-loading Zillow gallery. Getting this right is what separates the pros from the amateurs.
Navigating MLS Compliance and File Specs
The Multiple Listing Service (MLS) is the gatekeeper for most real estate listings, and it has very specific, non-negotiable rules for photos. If your images don’t meet their requirements, they can get rejected, delaying the entire listing.
While the exact specs can change a bit from one regional MLS to another, they almost always have strict limits on file dimensions and file size. Most platforms require a minimum resolution like 1024x768 pixels, but I never aim for the minimum. My standard practice is to export MLS-bound photos at 2048 pixels on the long edge. This gives you plenty of sharpness without creating a massive file.
Speaking of file size, many systems will reject anything over 10MB per photo.
To keep things simple, here are the settings I use for every MLS upload:
- File Format: It’s JPEG (.jpg), no exceptions. This is the universal standard.
- Resolution: Aim for 2048px on the long side. 1024px is the absolute minimum, but it’s better to be safe.
- Quality: I find a JPEG quality setting between 80-90% is the sweet spot. It keeps the image looking crisp while managing the file size effectively.
- Color Space: Always stick with sRGB. It ensures your colors look right on any screen, from an agent’s desktop to a buyer’s phone.
Create Export Presets and Stop Wasting Time
Manually plugging in these numbers for every single photo, for every single platform, is a recipe for disaster and a massive time sink. This is exactly why export presets in Lightroom, Luminar Neo, or whatever software you use are a game-changer.
An export preset is your one-click solution for consistency and speed. Set it up once, and you’ll never have to second-guess your export settings under a tight deadline again.
I have presets for everything: MLS, my own website, high-res print, and different social media platforms. It’s an essential part of a fast, repeatable workflow.
Here’s a quick-reference table to help you build your own presets. Think of it as a cheat sheet for the most common places your real estate photos will end up.
Recommended Export Settings for Real Estate Photos
| Platform/Use Case | File Format | Resolution/Size | Color Space | Key Considerations |
|---|---|---|---|---|
| MLS & Zillow | JPEG | 2048px (long edge) | sRGB | Balance quality and file size; keep it under 10MB. |
| Print Brochures | TIFF or JPEG | 300 DPI, full resolution | CMYK or sRGB | Use the highest resolution possible. Ask your printer about their preferred color space. |
| Website/Portfolio | JPEG | 1600-2000px (long edge) | sRGB | Optimize for web to ensure fast page load times without sacrificing too much quality. |
| Instagram/Facebook | JPEG | 1080px (short edge) | sRGB | Crop to appropriate aspect ratios (e.g., 4:5 for Instagram posts) to maximize screen space. |
Setting these up takes a few minutes, but it will save you hours of tedious work and prevent costly mistakes down the road.
The Final Polish Before You Export
Before you hit that final “Export” button, there are a couple of small details that make a big difference.
First, output sharpening. When you shrink a big, high-resolution photo for the web, it naturally loses a little bit of its crispness. Most editing software has an “Output Sharpening” or “Sharpen for Screen” option in the export dialog. Use it. A “Standard” or “Low” amount is usually all it takes to bring back that sharp, professional look.
Next, consider your watermark. It’s a great way to protect your work and reinforce your brand. Just make sure it’s subtle—a small, semi-transparent logo in a corner is all you need. If you’re looking for a simple process, BrightShot has a great walkthrough on how to watermark photos without it being distracting. It’s a smart final touch to ensure your images work for you long after you deliver them.
Your Top Real Estate Photo Editing Questions, Answered
As you get deeper into editing your own real estate photos, you’ll inevitably run into a few common questions. I’ve heard them all over the years, from new agents trying to save a buck to seasoned photographers looking to speed up their workflow. Let’s clear up some of the most frequent ones.
How Much Editing is Too Much?
This is the big one. Your goal is to make the property look like it does on its absolute best day—not like a different property altogether. Think of it like prepping for an open house. You’d open the blinds, turn on all the lights, and move the recycling bin out of the shot. Your editing should follow that same logic.
So, where’s the line? Go ahead and brighten up that shadowy living room, correct the strange yellow tint from incandescent bulbs, and definitely straighten those leaning vertical lines. It’s also completely standard to remove temporary eyesores, like a forgotten garden hose on the lawn or a car blocking the front door.
What you must avoid is pushing colors into the realm of the unbelievable or using a wide-angle distortion fix so aggressively that a small room looks like a cavern. The moment a buyer walks in and thinks, “This looks nothing like the pictures,” you’ve lost their trust.
The rule I live by is simple: Enhance, don’t misrepresent. The final photo should feel aspirational but, most importantly, authentic.
Is AI Virtual Staging Actually Better Than Physical Staging?
Honestly, for about 90% of properties, the answer is a resounding yes. The biggest factors here are speed and money. Virtual staging through a platform like BrightShot can cost a couple of hundred dollars for an entire house, whereas physical staging can easily run into the thousands.
Plus, you can get it done in minutes, not days. This makes it a no-brainer for vacant homes where you need to help buyers visualize the space. It’s also perfect for showcasing a room’s potential, like showing a spare bedroom as both a nursery and a home office.
Now, for those ultra-high-end, multi-million dollar luxury listings, physical staging still has its place. There’s a certain power in letting a buyer feel the texture of a real sofa or see the quality of a designer rug in person. But for the vast majority of the market, the cost savings and incredible speed of AI staging give you a massive competitive edge.
Can’t I Just Edit My Photos on My Phone?
The short answer? For professional results, no. While the latest phone apps are impressive for a quick social media post, they just don’t have the muscle for the kind of precision real estate photography demands.
Trying to produce high-quality listing photos on a phone means you’ll miss out on the critical tools that separate the pros from the amateurs. You’ll struggle with:
- Serious Perspective Correction: Getting walls, windows, and door frames perfectly vertical is nearly impossible without dedicated desktop software.
- Exposure Blending (HDR): Properly merging different exposures to show both the bright window view and the details inside is a complex task that mobile apps just can’t handle with a natural look.
- Pinpoint Color Accuracy: Nailing a true-to-life white balance across a room with mixed lighting is a pro-level job.
If you want your listings to stand out and look truly professional, you have to use the right tools. That means dedicated desktop software or, even better, a purpose-built AI platform.
Ready to skip the tedious parts and get straight to stunning results? BrightShot automates everything from virtual staging and object removal to creating beautiful day-to-dusk images in just a few clicks. Try BrightShot for free and see how fast you can elevate your listings.