HDR real estate photography is a game-changer. It’s a technique that combines several photos, all taken at different brightness levels, to create one perfectly lit image. This method completely solves that classic problem of having windows so bright they’re just white blobs, while the corners of the room are lost in shadow. By using HDR, every part of a room becomes clear and well-defined, making your listings look polished, professional, and far more inviting.
Why HDR Photography Is a Must for Real Estate
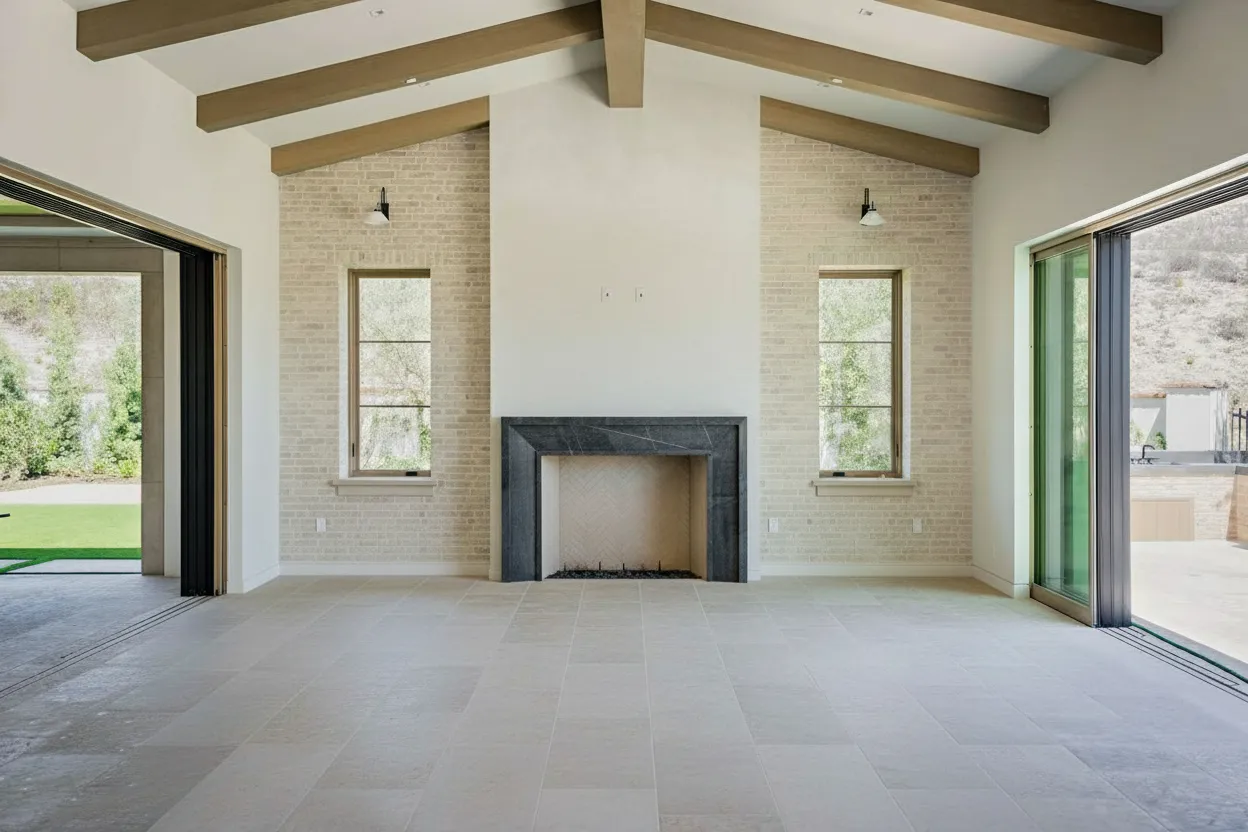
Have you ever tried to snap a picture of a gorgeous room, only for the photo to come out with blindingly bright windows and dark, murky corners? It’s a frustratingly common issue. Our eyes are incredible; they can adjust on the fly to see both the bright world outside and the dimmer interior all at once. A camera, on the other hand, can’t. It has to pick one, and the result is almost always a photo that just doesn’t do the space justice.
This is exactly where High Dynamic Range (HDR) photography steps in. Think of it as giving your camera the ability to see a room the way you do. It isn’t some trendy filter or a quick editing trick—it’s a fundamental technique for capturing a space authentically.
The whole point of HDR real estate photography is to capture the full range of light in a scene, from the deepest shadow to the brightest window view, which is impossible in a single shot. This approach creates images that feel true-to-life, vibrant, and packed with detail.
Capturing What the Eye Can See
The magic happens by taking a series of photos of the exact same scene, but each one at a different exposure setting. This set of photos is called a “bracket.” A typical bracket includes at least three shots:
- An underexposed shot: This one captures all the detail in the brightest spots, like the beautiful landscape you can see through a window.
- A normal shot: This is your baseline, capturing the mid-tones of the room just right.
- An overexposed shot: This one brightens things up to pull all the rich details out of the darkest shadows.
After the shoot, these images are loaded into special software. The software then intelligently picks the best-exposed parts from each photo and stitches them together. The final product? One stunning photograph where the sunny backyard is crystal clear through the window, and the cozy details of the living room are equally rich and visible.
Here’s a quick look at how the two approaches stack up.
HDR vs Standard Photography At a Glance
This table breaks down the practical differences you’ll see between a standard, single-shot photo and a final HDR image in a real estate context.
| Feature | Standard Photography | HDR Photography |
|---|---|---|
| Window Views | Often “blown out” (pure white) with no visible detail outside. | Clear and detailed, showing the exterior view accurately. |
| Shadows & Corners | Dark, murky, and lacking in detail. | Bright, clear, and full of visible texture and detail. |
| Color Accuracy | Colors can appear washed out or overly dark. | Vibrant, rich, and true-to-life across the entire image. |
| Overall Impression | Can look amateurish and doesn’t represent the space well. | Professional, polished, and gives a realistic feel of the home. |
| Dynamic Range | Low; struggles to capture both very bright and very dark areas. | High; captures a wide spectrum of light, mimicking the human eye. |
Ultimately, the goal is to present a property in its best—and most accurate—light, which is where HDR truly shines.
The Financial Impact of Great Photos
Let’s be clear: using professional HDR photography isn’t just about making listings look pretty. It’s a strategic move that delivers real business results. In today’s crowded market, your photos are the very first handshake with a potential buyer, and that impression has to be a great one.
The data backs this up, showing a strong link between high-quality images and sales performance. Properties marketed with HDR photos don’t just get a little more attention; they attract 118% more online views and tend to sell 50% faster. This technique also boosts a property’s perceived value, often allowing for higher asking prices. You can dive deeper into these numbers by checking out these insights on HDR vs standard real estate photos from HomeJab. For both agents and photographers, this means HDR isn’t an expense—it’s a direct investment in faster sales and better returns.
Mastering Your On-Site HDR Workflow
Great HDR photos aren’t born in editing software; they’re made on-site. The truth is, the quality of your final image is almost entirely dependent on the quality of the photos you take at the property. Nailing your process in the field is the secret to avoiding frustrating reshoots and hours of post-processing headaches.
It all starts with one piece of gear that is absolutely non-negotiable: a sturdy tripod. Because HDR relies on layering multiple photos, even the tiniest camera movement between shots will ruin the final image with blur and misalignment. A tripod is your guarantee that every frame in your sequence is perfectly aligned, which is the bedrock of a sharp, professional result.
Setting Up Your Camera for Success
Once your camera is locked down on the tripod, it’s time to dial in your settings. Your main goal here is consistency. You want every shot in your bracketed series to be identical in every way except for the shutter speed. This ensures your depth of field and image noise don’t change from one frame to the next.
This is why Aperture Priority mode (A or Av) is your best friend. It’s a semi-automatic mode that lets you lock in the aperture and ISO yourself, while the camera intelligently adjusts the shutter speed for each shot to get the exposure right.
Here are the settings I use as a starting point for almost every interior shoot:
- Shooting Mode: Aperture Priority (A/Av).
- Aperture (f-stop): I stick between f/8 and f/11. This range gives you a deep depth of field, keeping everything from the chair in the foreground to the art on the back wall tack sharp.
- ISO: Keep this as low as your camera will go, usually ISO 100 or 200. This minimizes that ugly digital grain and gives you the cleanest possible images.
- White Balance: Ditch Auto White Balance. Set it manually to a specific preset (like “Tungsten” or “Daylight”) to keep the color temperature consistent across all your exposures.
- File Format: Always, always shoot in RAW. This format captures a massive amount of image data, which gives you far more wiggle room when you start merging and editing later.
For a deeper dive into these settings, check out our guide on essential real estate photography camera settings.
Nailing Your Exposure Bracketing Strategy
With your settings locked in, you’re ready to capture the bracketed exposures—the very heart of the HDR technique. Most modern cameras have a feature called Auto Exposure Bracketing (AEB) that makes this a breeze. You just tell the camera how many shots you want and how far apart their exposures should be.
For most situations, a standard 3-shot bracket is the workhorse of real estate photography. This usually means one “correct” exposure (0), one underexposed shot to capture the bright windows (-2 EV), and one overexposed shot to see into the dark corners (+2 EV). This range is typically plenty for most residential rooms.
But what about those really tricky rooms? Think of a living room with a giant wall of sun-drenched windows next to a dark, unlit hallway. For scenes with that kind of extreme dynamic range, a 5-shot bracket (e.g., -4, -2, 0, +2, +4 EV) is much safer. It gives your software more data to play with, resulting in a cleaner, more natural-looking final image without weird artifacts or noise.
This is how those different exposures come together to create the final, balanced shot.

As you can see, the darkest shot saves all the detail outside the window, the brightest shot brings out the detail in the shadows, and the middle shot handles everything in between. They all merge to create one perfectly exposed photo.
Composition: The Final On-Site Touch
Beyond all the technical settings, what really separates a good photo from a great one is composition. Don’t forget the fundamentals of real estate photography while you’re on site.
- Shoot from Corners: This is a classic for a reason. This angle makes rooms feel bigger and more inviting, showing off the layout and flow.
- Keep Your Verticals Straight: Nothing screams “amateur” like tilted walls. Use your camera’s built-in grid lines or a bubble level to make sure all your vertical lines—door frames, windows, corners—are perfectly straight up and down.
- Mind Your Height: The industry standard is about 5 feet (or 1.5 meters). This gives a natural, eye-level perspective of the room. You can adjust slightly to get a better composition, but try to avoid shooting from super high or low angles.
Combine a stable tripod, consistent camera settings, and thoughtful composition, and you’ll walk away with flawless source images every time. This prep work makes the next stage—post-processing—so much easier and more effective.
Bringing Your HDR Images to Life in Post-Processing
You’ve done the hard work on-site, capturing sharp, perfectly bracketed shots. But the real magic of HDR photography unfolds back at your computer. This is where those separate exposures stop being just data and start becoming a single, stunning image that truly sells the space.
The process kicks off by pulling your bracketed RAW files into software built for the job. Industry workhorses like Adobe Lightroom Classic or more specialized tools like Photomatix Pro are designed to take your dark, medium, and bright shots and weave them together. They create one massive file that holds every bit of light information you captured, from the deep shadows in the corner to the bright sunlight streaming through the window.
Now, this initial merged file isn’t your final photo. Think of it as a digital negative—a high-bitrate, 32-bit image packed with an incredible amount of light and color data, way more than any standard screen can actually display. The next step is where your eye for detail comes in, turning that raw potential into a polished final product.

The Art of Tone Mapping for Natural Results
Once the merge is complete, you move into what’s called tone mapping. This is the delicate art of compressing all that rich 32-bit light information into a standard image (like a JPEG) that looks fantastic on any device. It’s all about carefully balancing the shadows, highlights, mid-tones, and color to produce a final image that feels just like you’re standing in the room.
The goal is always realism. A classic mistake with HDR is pushing the edits too far, ending up with a surreal, almost cartoonish look with crunchy textures and glowing colors. For real estate, subtlety is your best friend. You’re trying to create a clean, inviting photo that makes the property look its best, not show off your editing tricks.
The most effective HDR editing in real estate is the kind you don’t even notice. The photo should just feel right—perfectly lit from the darkest corner to the brightest window, inviting buyers to step inside and imagine themselves living there.
To get that natural look, think in small increments. Instead of slamming the “Clarity” or “Saturation” sliders to the max, nudge them gently. Your focus should be on coaxing detail out of the shadows and gracefully taming the bright highlights from the windows. The result you want is a photo that feels bright and airy, never fake. If you’re curious about how technology can automate this, our complete guide to AI real estate photo editing explores how modern tools are changing the game.
Essential Finishing Touches and Ghost Removal
Even with a rock-solid tripod, little issues can pop up in the final merged image. One of the most common culprits is ghosting. This happens when something moves between your bracketed shots—maybe leaves rustling on a tree outside, a ceiling fan that was accidentally left on, or even a person walking by in the background. This movement creates blurry, transparent artifacts that can ruin an otherwise perfect shot.
Thankfully, good HDR software has a “de-ghosting” tool built right in. It lets you pinpoint the problem area and select one of your original photos as the “master” for that spot. The software then uses the data from only that single frame to render the moving object, eliminating the blur completely.
Here’s a quick rundown of the final steps to nail your HDR post-processing:
- Merge Brackets: Start by combining your RAW files in your chosen software.
- Check Alignment: Most programs handle this automatically, but double-check that your images are perfectly aligned.
- Subtle Tone Mapping: Adjust highlights, shadows, and contrast to find that natural, true-to-life balance.
- De-Ghosting: Scan the image for any motion blur and use the de-ghosting tool to clean it up.
- Final Polish: Finish with standard edits like straightening vertical lines, correcting lens distortion, and tweaking the white balance for perfect colors.
By sticking to a structured workflow like this, you can consistently turn your bracketed exposures into the kind of professional, eye-catching images that help agents close deals.
Comparing HDR to Other Popular Techniques
While HDR is a fantastic tool and a workhorse for many real estate photographers, it’s not the only way to get the job done. To really know your craft, you need to understand the other big players in the game: manual exposure blending and the newer AI-powered enhancements. Knowing the pros and cons of each helps you pick the right tool for the right job, balancing your time, your client’s budget, and the final look you’re after.
Each of these methods comes with its own set of trade-offs. One might be perfect for a quick-turnaround rental listing, while another is better suited for a high-end architectural shoot. Let’s dig into how they compare.
The Artisan’s Choice: Manual Exposure Blending
This is the technique you’ll hear high-end and architectural photographers swear by. Often called the “flambient” method (a mashup of flash and ambient), manual blending is all about total control. It’s a much more hands-on process than automated HDR.
The photographer typically starts with a solid ambient light photo and then takes several more shots, using an off-camera flash to “paint” light into specific areas—filling in dark corners, adding a pop to a piece of furniture, or perfectly exposing a tricky surface. Back in Photoshop, these different exposures are meticulously layered and blended by hand. You get pixel-perfect control over everything. The downside? It takes a ton of time and a high level of skill, both on-site and in post-production.
The Next Evolution: AI-Powered Enhancement
On the other side of the coin, we have the latest development in photo editing: AI enhancement. Services like BrightShot are completely changing the game when it comes to efficiency. Instead of needing multiple bracketed shots or complex flash setups, these tools can often produce a stunning, well-balanced image from just a single RAW or JPEG file.
The AI gets to work in seconds, analyzing the photo to correct lighting, punch up the colors, and sharpen details. It can lift the shadows in a dimly lit room and pull back the detail in a blown-out window view, giving you a result that looks remarkably similar to a traditional HDR or even a flambient shot, but without all the manual labor. For photographers handling high-volume work, this kind of speed and consistency is a lifesaver. You can even see how these AI techniques can transform 3D renders into realistic images in our tutorials.
The push for better photos makes perfect sense when you look at the numbers. The HDR real estate photography market was valued at a whopping $1.2 billion in the U.S. in 2022. Homes with professional photos can sell for $934 to $116,076 more, pull in 61% more views, and even make rooms feel 33% larger online. If you want to dive deeper, Photoup has a great breakdown of these real estate photography statistics.
Workflow Comparison: HDR vs. Exposure Blending vs. AI Enhancement
To make it even clearer, here’s a straightforward comparison of how these three methods stack up against each other in the real world. This table breaks down what you can expect in terms of time, cost, skill, and results.
| Attribute | Traditional HDR | Manual Exposure Blending | AI Enhancement (e.g., BrightShot) |
|---|---|---|---|
| On-Site Time | Moderate (bracketing required) | Long (multiple flash shots) | Fast (single shot is often sufficient) |
| Post-Processing Time | Moderate (automated merging) | Very Long (manual blending) | Seconds (automated processing) |
| Skill Level Required | Intermediate | Advanced / Expert | Beginner-friendly |
| Control | Good (adjustments in tone mapping) | Absolute (pixel-level control) | Good (customizable AI models) |
| Consistency | High (software-driven) | Varies (depends on artist skill) | Very High (consistent AI output) |
| Best For | Efficient, high-quality results at scale. | Luxury listings and architectural work. | Speed, volume, and automating workflows. |
So, what’s the final verdict? It really comes down to your business. Traditional HDR is a fantastic middle ground, offering a great balance of quality and speed. Manual blending is the peak of artistic control for those bespoke, high-budget projects. And AI enhancement is an incredible tool for photographers looking to scale their business with lightning-fast turnarounds and unwavering consistency.
The Future of Real-Estate Photography Is AI
For years, HDR real estate photography was the gold standard for solving the most common problem we face: balancing bright windows with dark interiors. But technology doesn’t stand still. The next big shift is here, and it’s powered by artificial intelligence. AI isn’t just about making small tweaks anymore; it’s becoming an all-in-one creative partner that automates tasks that used to be incredibly complex and time-consuming.
Think of it as an evolution. The original goal of HDR was to capture a property’s true potential by showing every detail, from the sunlit yard to the shadowed corners. AI takes that idea and runs with it. It lets photographers and agents not just capture a home’s potential but actively showcase it in ways we could only dream of a few years ago.

More Than Just a Photo Fix
Modern AI platforms like BrightShot have moved far beyond just balancing light and fixing colors. They now offer a whole menu of services that can turn a standard photo set into a powerful marketing package with just a few clicks.
This changes what it means to be a real estate photographer. It’s no longer just about taking accurate photos. It’s about creating a visual story that helps a buyer truly imagine themselves living in the space. This is where AI really delivers, bridging the gap between an empty house and a future home.
The real magic of AI in our field is how much friction it removes. Things that once took hours of painstaking manual editing, multiple software subscriptions, or hiring expensive specialists can now be done almost instantly. It makes high-end visual marketing accessible to everyone.
This is a huge advantage. It means you can offer premium services without the premium price tag or the long wait times, which can really set you apart from the competition.
A Full Visual Marketing Suite in One Place
Imagine this: from a single photoshoot, you can offer your client a complete visual package. That’s what AI-powered tools are making possible right now by automating services that used to require a specialist.
Here’s a quick look at what modern AI can do:
- Virtual Staging: Fill empty rooms with stylish, realistic furniture and decor. This is a game-changer for helping buyers see a room’s potential. You can see exactly how it works in our article on the power of AI for vacant home staging.
- Object Removal and Decluttering: Got a messy room? AI can digitally remove clutter, personal photos, or clunky furniture to present a clean, inviting space.
- Day-to-Dusk Conversion: Turn a simple daytime exterior shot into a stunning twilight photo with glowing windows and a dramatic sky. These images are proven to stop the scroll online.
- Sky and Lawn Replacement: Swap out a drab, gray sky for a perfect blue one, or instantly transform a patchy, brown lawn into a vibrant green carpet.
This kind of one-stop-shop is quickly becoming the new industry standard.
The New Baseline for High-Volume Shoots
Looking ahead, we’re going to see technology blend even more seamlessly into our workflow. By 2026, today’s HDR techniques are expected to be fully integrated with these AI tools, cementing their role in marketing. While old-school HDR meant manually merging different exposures, modern AI platforms can get a similar dynamic range from a single shot with smart lighting adjustments and sky replacements. These features are already becoming baseline expectations for any high-volume work.
Recent surveys reveal just how fast this is happening: 53% of photographers already offer virtual staging alongside their HDR services, and a whopping 70% use AI for edits like decluttering. This is slashing costs and turnaround times for their clients. As highlighted in some valuable insights on HDR for real estate from Imagen, this shift is empowering photographers and agents to deliver a much more compelling marketing package faster and more affordably than ever before, giving listings a massive boost in a crowded market.
Your Top Questions About HDR in Real Estate Photography, Answered
Once you get the hang of what HDR is, the real-world questions start to surface. It’s true, this technique has a few more moving parts than your standard point-and-shoot method, but nailing those details is what separates the average from the amazing. Let’s dig into some of the most common questions photographers have when they’re just getting started.
Getting these answers down will help you build a smoother, more confident workflow and prepare you for any lighting curveball a property can throw at you.
Do I Really Need a Tripod for HDR Photography?
Yes. Absolutely, 100%. If there’s one non-negotiable piece of gear for quality HDR, it’s a sturdy tripod.
Think about it: the whole process hinges on blending multiple photos taken at different shutter speeds. For the software to layer them perfectly, the camera has to be rock-solid. Even a millimeter of movement between shots will lead to misalignments, and you’ll end up with a soft, blurry image plagued by ugly ghosting. A tripod is your guarantee that every single frame is perfectly aligned, giving you that tack-sharp, professional look every time.
How Many Exposures Should I Take for Each Scene?
The number of shots you need really just depends on the room’s dynamic range—that is, the gap between the absolute darkest shadow and the brightest highlight. Your goal is simply to capture enough information to blend everything cleanly.
- For most interior spaces, a 3-shot bracket is your workhorse. A standard spread like -2, 0, and +2 EV (exposure value) usually gives you more than enough range to pull detail from both a bright window and a dark corner.
- But sometimes, you run into a high-contrast monster. Picture a living room with a giant wall of windows on a bright, sunny day. For scenes like that, a 5-shot bracket (say, -4, -2, 0, +2, +4 EV) is a much safer bet. This wider range feeds your software more data to work with, resulting in a smoother, more natural-looking photo without weird noise or color problems.
How Can I Make Sure My HDR Photos Look Natural?
This is the big one. We’ve all seen those cringey, “overcooked” HDR photos that look crunchy, surreal, and almost like a video game. The secret to avoiding that and getting a natural look is all about restraint during your post-processing.
The goal of HDR in real estate is always realism. You want to create an image that feels like you’re standing in the room, not a piece of digital art. The best HDR editing is the kind that nobody even notices.
This means being gentle with those editing sliders. Instead of ramming the saturation, contrast, or clarity all the way up, make small, deliberate adjustments. Focus on balancing the light to look the way your own eyes would perceive it. Thankfully, modern HDR software and AI-powered editors are getting incredibly good at producing photorealistic results right out of the gate, making it easier than ever to get a clean, believable final image.
Are There Times I Should Avoid Using HDR?
Definitely. While it’s a fantastic tool for high-contrast interiors, HDR isn’t the solution for every single photo. There are a few scenarios where it might do more harm than good.
The biggest one is any scene with a lot of uncontrollable movement. If you’ve got trees swaying wildly in the wind outside a window or a steady stream of cars driving by, that motion between your bracketed shots will create a messy “ghosting” effect that can be a real pain to fix.
HDR also isn’t necessary for every shot. If you’re in a room with very flat, even lighting—like a windowless basement or a hallway on a gray, overcast day—the dynamic range is already quite low. In those situations, a single, well-exposed RAW file often has all the data you need. Forcing an HDR process on it just complicates your workflow for no real benefit. Think of HDR as a specialized problem-solver, not a default setting for everything.
Ready to skip the complexities of bracketing and manual editing altogether? With BrightShot, you can achieve stunning, perfectly balanced photos from just a single image. Our AI analyzes your photos and instantly corrects lighting, enhances detail, and delivers professional, listing-ready results in seconds. Try it for free and see how much time you can save at https://bright-shot.com.